

Google Ads have been changing all the time and in the last 5 years significantly. Not only do they change how the account looks, but add additional settings and options. Some of them can be found easily, others are hidden away. It is hard to get a grasp of where to find what and how it affects your campaigns or your account in general.
We all know that not all that is recommended or enabled by default is good for you. Let’s explore, in my opinion, quite important settings you have to know if you’re doing Google Ads. Even people who have worked with Google Ads for years miss some of these.
Auto-applied recommendations
This is very important and should be known to all. As I just mentioned not everything that Google recommends is great. It’s great to get recommendations that you can test, but applying them without your knowledge is another thing.
Here’s what I’m talking about:
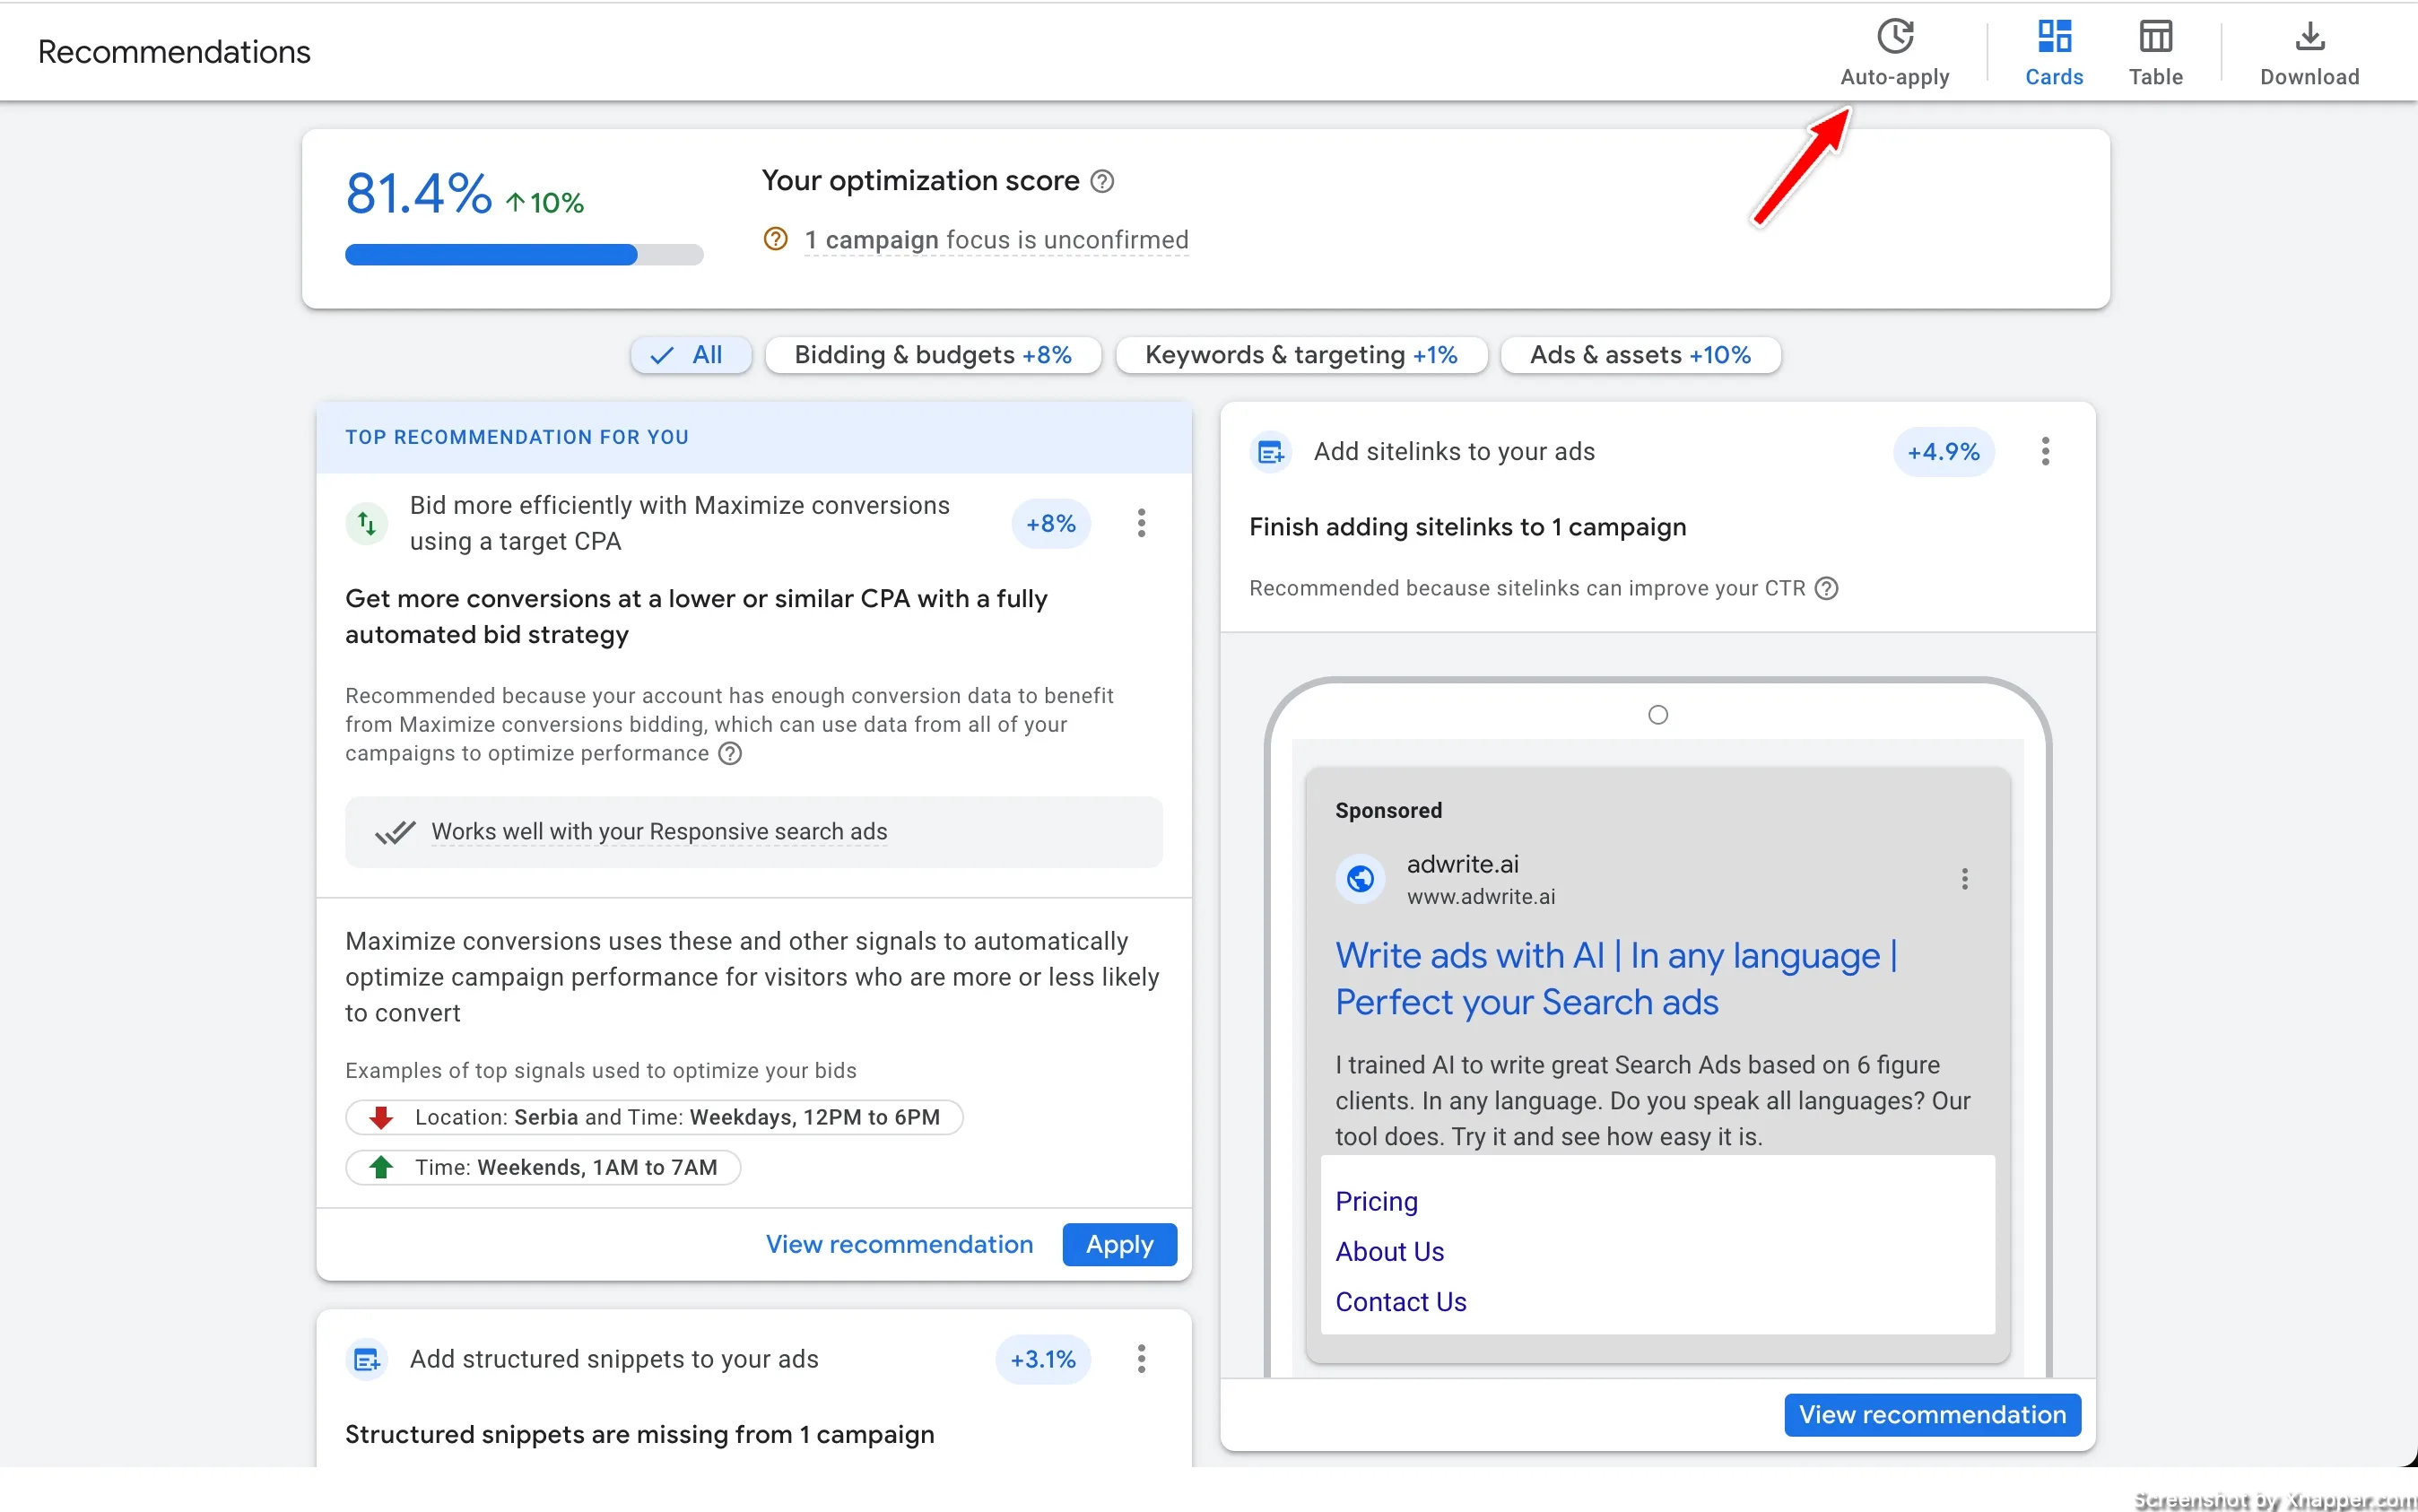
You can go over them and review them if you see that they make sense. Then apply some of them if you want. But what you don’t want is Google applying it without you even seeing what. Eventually, you might lose track of what was changed and that is bad.
You can opt out of auto-applying suggestions. Just hit the auto-apply on top and uncheck every checkbox. You can always come back and check the ones that you want or need.
Ads Rotation
This is one of a few that needs to be a default selection. Years ago, Google was not that good at optimizing rotation and many pros wanted to test ads on their own, which was hard if Google wasn’t showing all ads equally. Also, you could have many ads in the ad group, but with Responsive Search Ads you can have only 3.
So it only makes sense to leave this option as Google’s machine learning became a lot smarter.
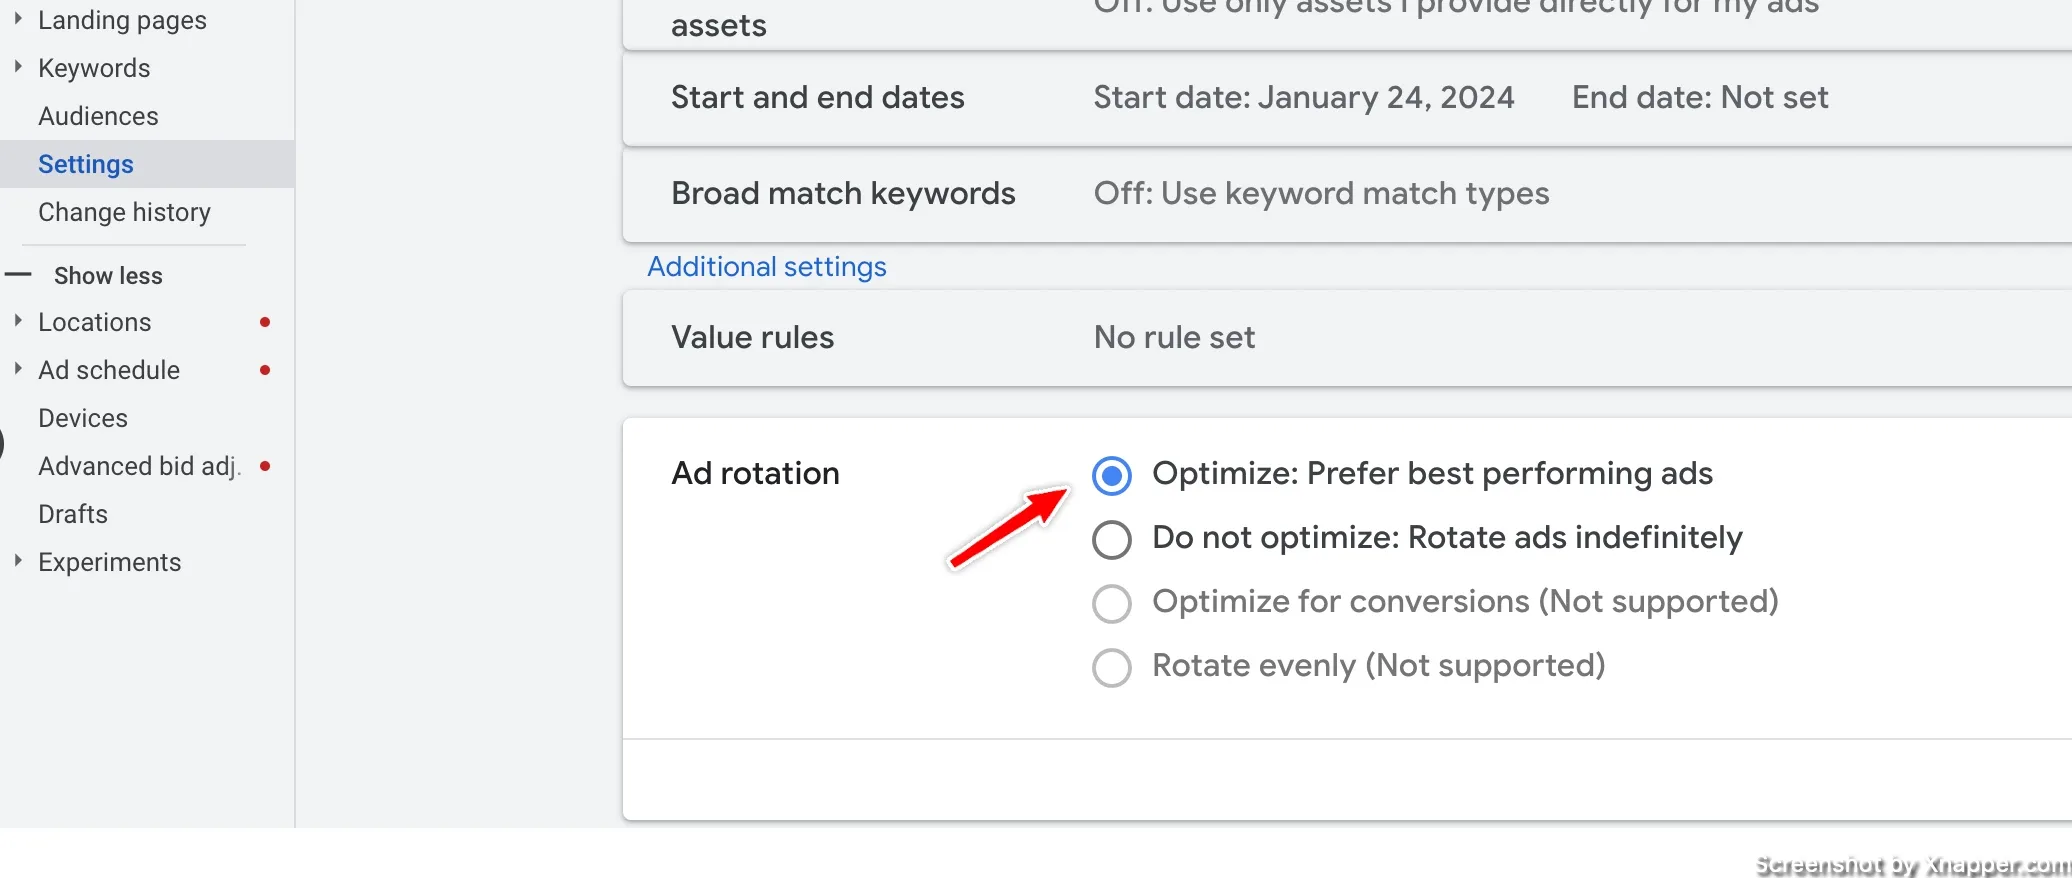
There are reasons, however, when you want to change this setting. Usually, if you test ads with software. You need both of them to get similar amounts of impressions and clicks. And you need to be the one deciding which performed better.
Location Settings
Even if you advertise in one location you should check this one out. Usually, the default selection is OK. But sometimes you might start getting traffic from weird locations. You might even start getting very bad leads. In this case, one of the first stops should be this campaign setting.
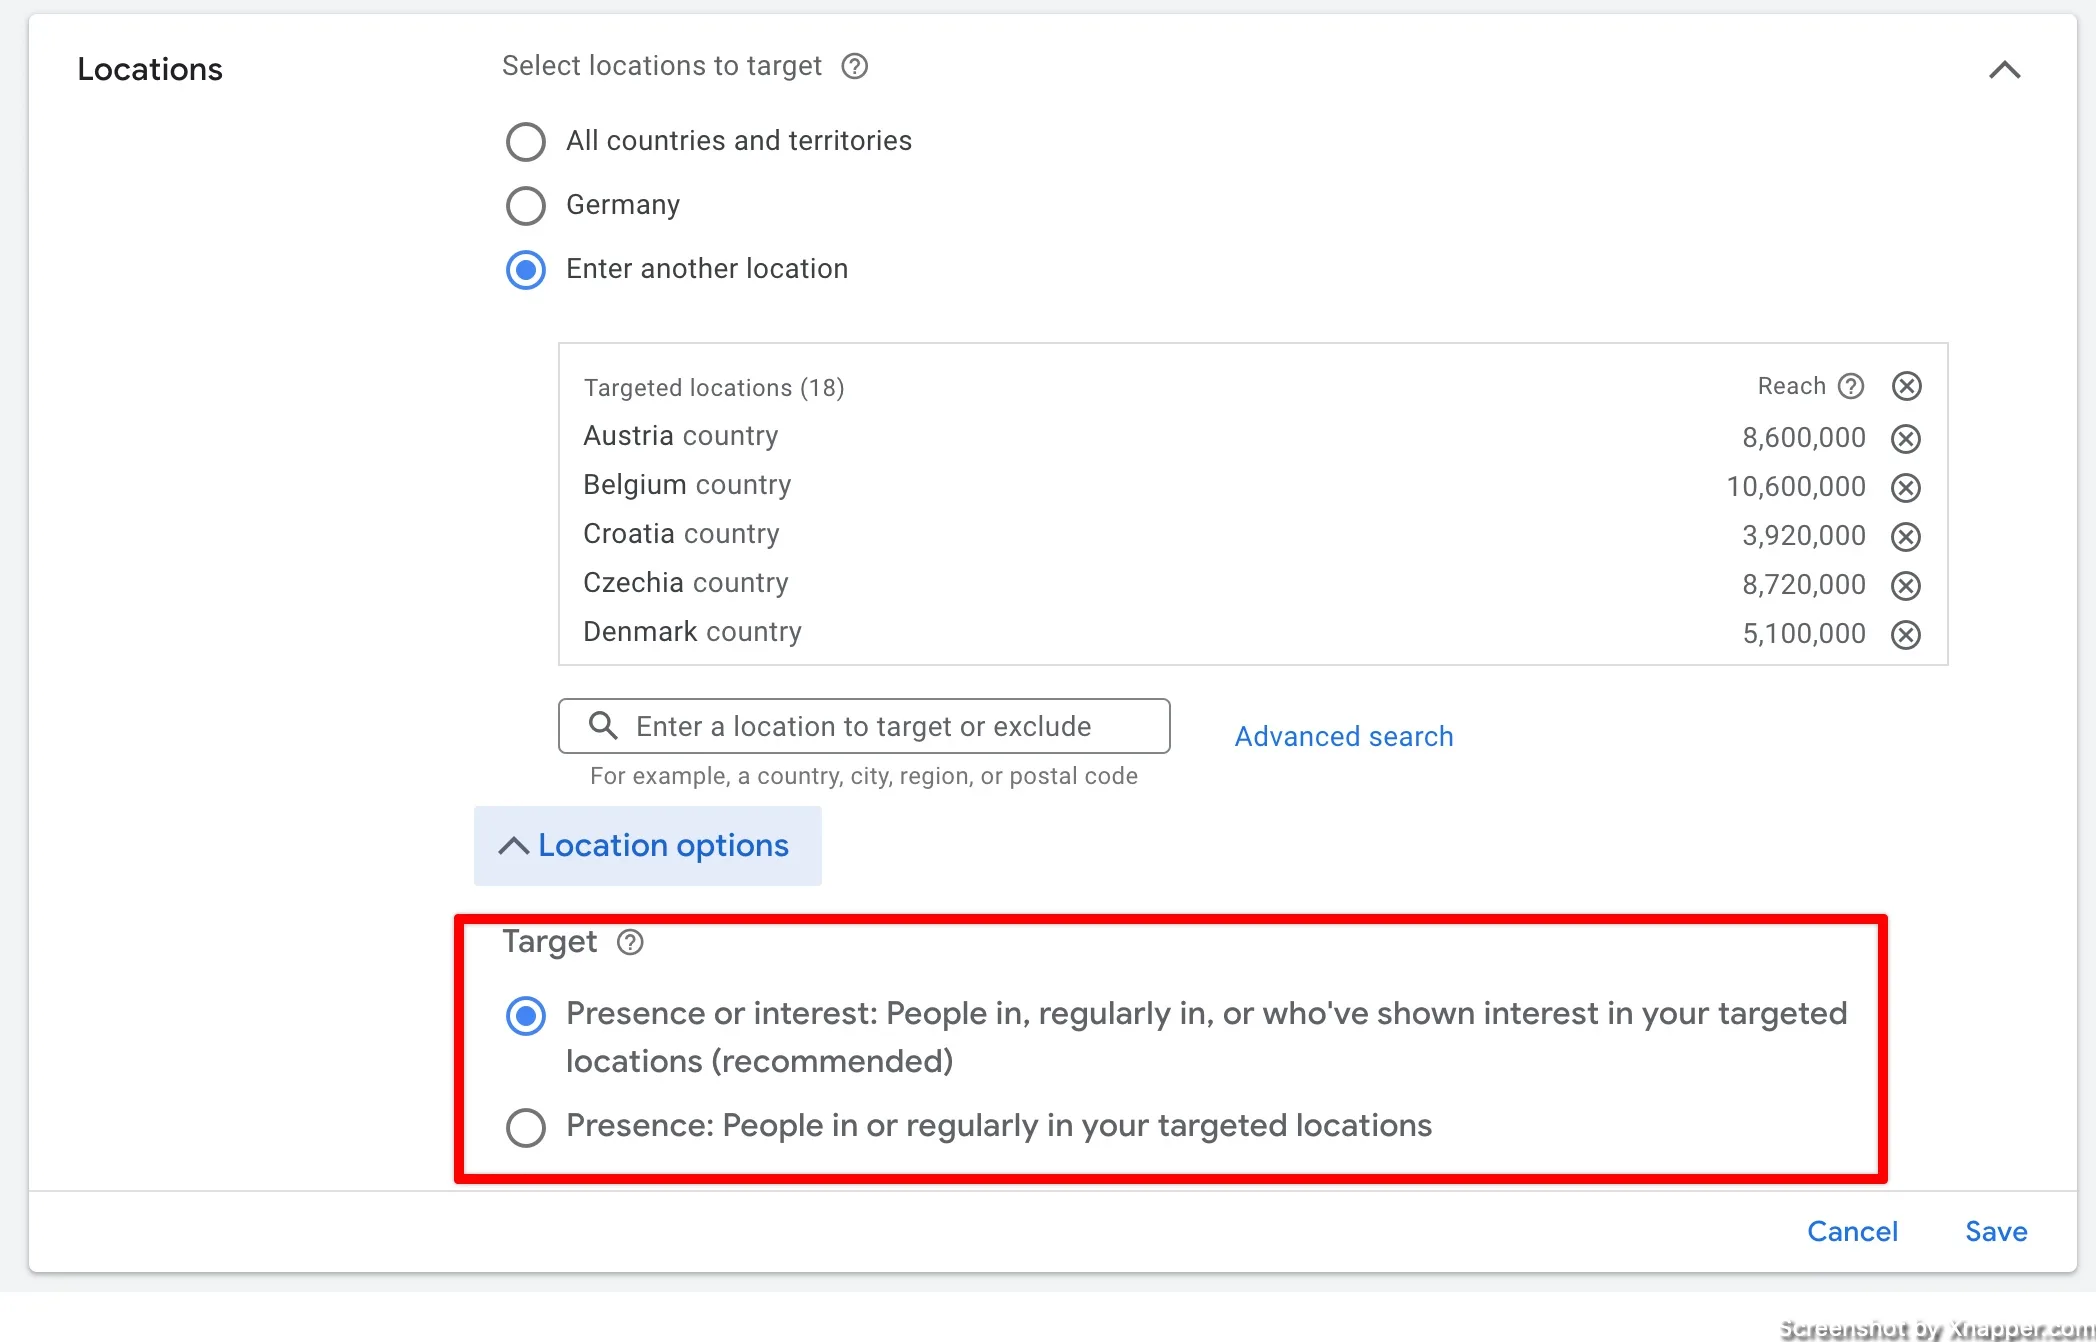
By default or Google recommended option is to leave the slightly broader definition of your location. You can see that from the description of each. So even if you target US or Germany, your ad might be shown outside of this area to people who are interested in your targeted location. How Google defines “show interest” is unclear.
So if you want to narrow that down, select the second option. That will limit the ads to people in your location. This is based on many factors including the IP address or device GPS coordinates. But do keep in mind that with VPNs this setting becomes irrelevant. There are 1.5 billion people using VPNs, but there is not much you can do.
Optimized targeting (display)
This is available when creating display campaigns. Optimized targeting allows Google to go beyond your specified targeting settings to find people who are likely to convert. Sometimes it works, sometimes it does not. But you have to know where it is and how to turn it off or on.
When creating your campaigns it will be in the targeting section:

It should be off by default and would not recommend turning it on. Get conversions, a lot of them, then come back and you can test it.
If you have your campaigns running, you can double-check if you have it enabled or not. Sometimes if it is enabled and your campaign does not perform, switching it off might make things better.
Select your ad group and click on settings. Then find a link in the image.

After clicking it, you should see this.

Frequency management
This is another often missed setting for Display and YouTube campaigns. If you run your display campaigns you know that your ads can be shown to the same person over and over again. Usually, this is good, as various research says that people need to see ads several times before engaging with them. And there are plenty of studies around brand exposure and its effects.
But in marketing, there is this rule called “the rule of 7”, that suggests that customers need to see your brand 7 times before committing to a purchase. It’s an old concept and sometimes it works other times it does not.
But with display campaigns, especially with a limited budget, I sometimes use it to limit how many times the same person sees my ad. And I start with 7.
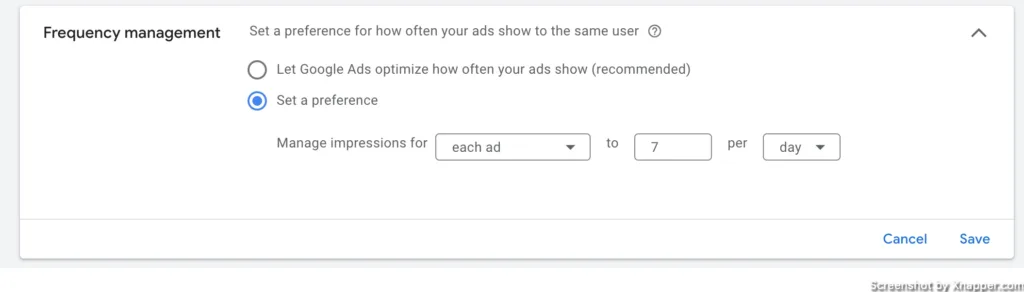
Whether it’s per day or per week, depends on the product and the budget. But you need to know where to find this setting and how to change it. It’s under campaign settings, and you might need to expand additional settings.
Content suitability
Although you can select it during your Display or YouTube campaign setup it is convenient to know where you can set it for all your campaigns (except Search and Apps).

If you click on the “compare inventory types” you will see here your ads won’t be shown. The summary provides a decent explanation, though. Sometimes you just don’t want your ads to appear next to content that is not in line with your brand or personal views.
Load campaign settings
This one is a setting but also like a shortcut as well. Saves time, when you create several campaigns. When you click the big plus icon, it will give you a drop-down.

When you click on load campaign settings, you will have to choose from which campaign you want to load them. But be sure to review everything. Some settings are still loaded as default.
But it will become your best friend, it’s just so easy and fast.
Account Access
This might be a no-brainer, but in my experience, not a lot of clients know this. I constantly have to explain where they can add users or approve my access. When you go into Settings and then find Account Access & Security, you will see a list of users who have access to your account, including you.

Bonus: Search
It’s not a setting, but rather a feature, but it kind of makes sense to add it here. Browsing around the account can be daunting, so they made a pretty good search to navigate faster. It also helps if you don’t know what the setting is called, so it is a bit similar to Google’s Search autocomplete.
Click on the Search in the menu on top and type whatever you want to find:

It’s very convenient and you don’t need to remember where everything is. I actually know some people who just use this search and don’t use the menu.
I share weekly tips on how to create, manage, and scale Google Ads campaigns. Subscribe to my free newsletter.
I’m also down with connecting on LinkedIn.
Or follow me on X, for some quick updates and fast insights.
